A minibar fits inside the cabinet opening on the furniture drawing. That proves one relationship: its closed outside dimensions fit the drawn space. It does not prove the appliance is permitted in that installation, has the required ventilation or can open far enough for normal use.
Approve the appliance and casegood together before releasing the cabinet for manufacture. Give the furniture supplier the exact appliance reference and current installation instructions. A rendering of a refrigerator behind a decorative door is not an installation detail.
Check installation permission first
Ask the appliance supplier whether the selected model is intended for the proposed arrangement: freestanding, a permitted recessed installation or an enclosure behind a furniture door. Resolve that before refining the cabinet dimensions. Physical space alone cannot turn a freestanding product into a built-in one.
Summit’s MB13GLSS manual, for example, lists that model among the compact minibars it covers and describes freestanding use. It specifies ventilation space and says that, for best performance, the appliance should not be installed behind a cabinet door or with its base grille blocked. Those conditions belong with that appliance; they should not be transferred to a different minibar.
If the planned cabinet conflicts with the selected appliance’s instructions, return the arrangement to the suppliers and the responsible project reviewers. Choose a permitted appliance-and-furniture arrangement or revise the design. Do not ask the fabricator to add an improvised grille and treat that as manufacturer approval.
Separate the closed appliance from its installation space
The MB13GLSS product page gives an actual width of 15.88 inches, depth of 16.75 inches and cabinet height of 20.25 inches. Its nominal descriptions round those figures to 16, 17 and 21 inches. Use the exact current dimensions for coordination, while recognizing that the manufacturer’s installation conditions add other requirements.
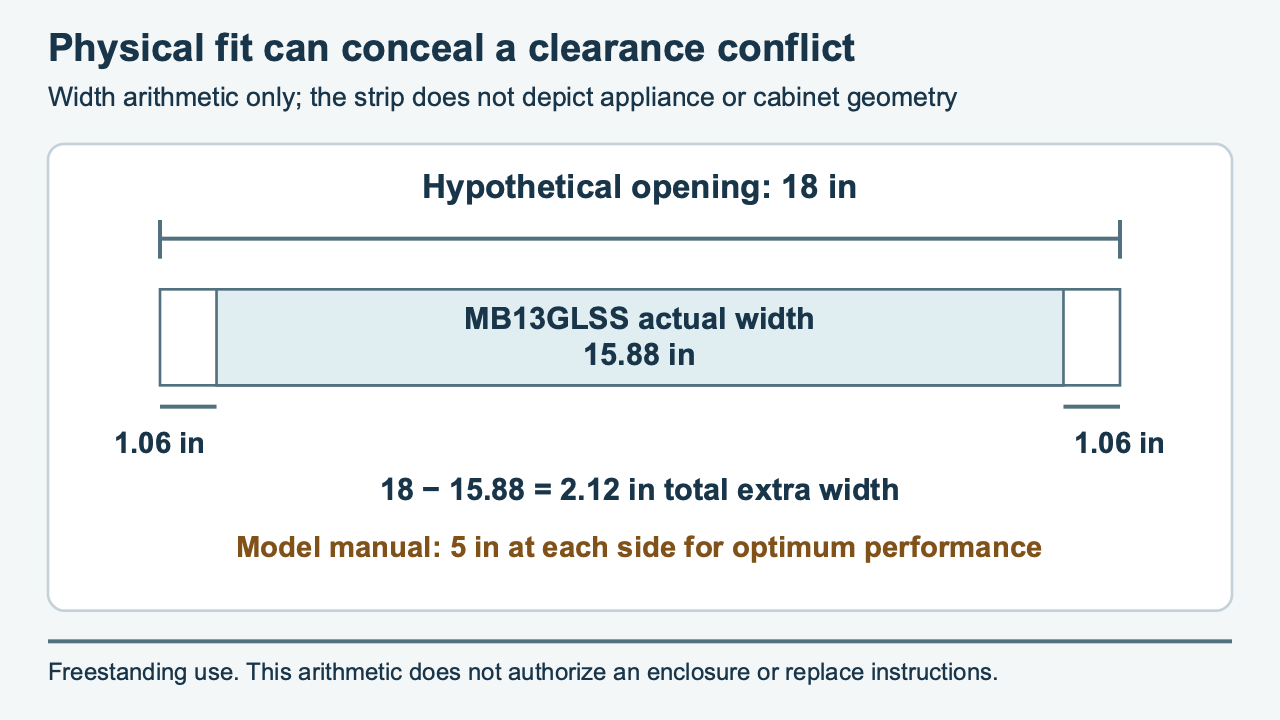
The linked manual specifies 5 inches at the back and sides and 4 inches at the top for optimum performance. A hypothetical 18-inch-wide opening leaves only 18 − 15.88 = 2.12 inches of total extra width. If the appliance is centered, that is 1.06 inches on each side, well below the manual’s stated 5-inch side spaces.
That arithmetic exposes a conflict; it does not design an acceptable enclosure. Even an opening with more space would still need to satisfy the permitted installation type and every applicable manufacturer condition. Obtain the actual accepted arrangement for the model being ordered.
Show where the ventilation space sits in the furniture drawing. A dimension to the outside of the casegood can conceal a back panel, drawer, shelf or other component occupying the space behind the appliance. Keep cable routing and the electrical connection visible for the qualified project team to review as well.
Draw the appliance open
The same product page lists 31.5 inches of depth with the door at 90 degrees. That is 14.75 inches more than its stated 16.75-inch closed depth. The open condition is a separate coordination dimension, not extra depth to add automatically to every cabinet.
Draw the actual hinge side and door sweep in the room. Check nearby furniture, the casegood opening and any furniture door proposed in front of the appliance. Ask the supplier what opening is needed for the intended access, including shelf removal. A 90-degree product dimension should not be treated as proof that every service task is possible at that angle.
Agree the handed arrangement before ordering. If the appliance offers a reversible door, have the supplier explain the approved configuration and who will perform any required change. Do not let a generic room rendering decide which side guests and housekeeping can use.
Leave an approved service route
Ask how the authorized technician will access and remove the appliance later. Identify the removable furniture parts, the connection location and the path from the cabinet into the room. Keep this within the supplier’s installation and service instructions; the furniture team should not modify the appliance to make removal easier.
Have the furniture supplier confirm the supporting surface and proposed load arrangement against the selected appliance information. The qualified electrical team should resolve the supply and connection. These responsibilities are separate from choosing a stain or approving the outside proportions of a credenza.
In the prototype, have the responsible team verify the accepted arrangement with the actual appliance and casegood. Check normal opening, cleaning access and the approved service arrangement. A fit trial does not certify refrigeration performance.
Carry the interface into the order
Add a short coordination record to the furniture specification:
| Decision | Record to keep |
|---|---|
| Appliance identity | Exact model, selected options and current manufacturer documents |
| Permitted installation | Supplier-confirmed arrangement and unresolved conditions |
| Furniture space | Opening dimensions, ventilation provisions, back/shelf details and support |
| Normal use | Handing, door sweep and access needed for the intended tasks |
| Service | Approved removal method, connection access and responsible parties |
| Final review | Accepted drawing revision and the prototype findings that must be resolved |
Keep appliance and furniture as distinct supply lines where different parties provide them. Name who is responsible for approving the interface between those lines. The spec book should let the factory find the accepted appliance reference as readily as the cabinet finish code.
Reopen the record if the appliance changes. A substitute described as the same nominal size may have different ventilation, door or installation conditions. Release the cabinet only when its drawing matches a permitted, reviewed appliance arrangement; save that reference for receiving and later service.